A Beginner's Guide to Plastic Welding with Hot Air Hand Tools

There’s no doubt that plastic welding is an effective, cost-effective option for bonding materials. Plus, with the right tools and a bit of knowledge, even beginners can achieve impressive results. In this guide, we'll delve into the world of plastic welding using hot air tools, providing you with essential tips and steps to get started.
What is Plastic Welding?
Plastic welding is a process that joins two pieces of plastic, creating a strong and durable bond. Hot air hand tools, also known as heat guns, play a crucial role in this method by melting the plastic at the joint, allowing it to fuse seamlessly when cooled. This technique is widely used for repairing items like automotive, aircraft, and watercraft parts, household items like cabinets, and even DIY projects.
>>Related read: 10 Tips for Successfully Welding Plastics
How to Choose the Right Hot Air Tool for Plastic Welding
Before exploring the plastic welding process, it's essential to select the right hot air hand tool for your needs. Several factors to consider include the following:
- Temperature control: Look for a hot air tool with adjustable temperature settings. This feature allows you to tailor the heat output to match the specific requirements of the plastic you're welding. Different plastics have distinct melting points, so having control over the temperature ensures a precise and effective weld.
- Airflow: Pay attention to the airflow capabilities of the tool. Sufficient airflow is essential for evenly distributing heat across the plastic surface. A tool with adjustable airflow settings provides versatility, allowing you to balance temperature and airflow for optimal results.
- Nozzle attachments: Select a hot air tool that comes with a variety of nozzle attachments. Different nozzle shapes and sizes cater to specific welding needs, such as concentrated or broad heat application. Having a selection of nozzles enhances your ability to work with various plastic shapes and sizes.
- Power output: Assess the power output of the hot air tool. Higher wattage typically means more heat, allowing for faster and more efficient welding. However, balance is key, as excessively high temperatures may lead to overheating and compromise the integrity of the plastic, and low temperatures may result in a weak weld.
- Brand quality: Consider the overall build quality of the hot air tool. Look for a durable and well-constructed device that can withstand prolonged use. A tool with a comfortable grip and ergonomic design ensures ease of use, especially during extended welding sessions.
Additionally, while choosing your hot air tool, make sure you’re choosing the right welding material. Make sure that the plastics you're working with are the same type of plastic (polyethylene or PE, polypropylene or PP, polyvinyl chloride or PVC, etc.). Each type of plastic material has its own melting points and bonding characteristics. This will ensure a strong and uniform bond.
Overall, for beginners, a tool with adjustable temperature settings and a variety of nozzle options, such as the IHS Type 1600 Hot Air Tool, can provide flexibility and ease of use.
How to Prepare Your Plastic Welding Workspace
Creating a suitable workspace is key to successful plastic welding. Start by ensuring your workspace is free of any loose materials or debris that can contaminate the surfaces of the plastic substrates and compromise the overall strength of your weld.
Once you’ve prepared your workspace, conduct a test weld to ensure quality and bond strength. To conduct a test weld, follow these steps:
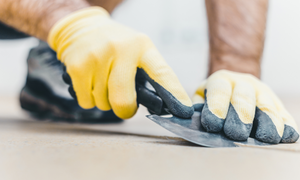
- Prepare and clean: Cut small test pieces from the plastic materials you plan to weld. Using a tool like the IHS Stick Beveler Scraper removes the thin film of oxidation that usually forms on thermoplastic substrate surfaces. After removal of the oxidized layer from the areas to be welded, use rubbing alcohol or mild soapy water solution to clean the area that has been scraped, as well as the surrounding substrate surface of any contaminates. Also, be sure the surfaces are thoroughly dried.
- Secure and tack: Secure the test pieces in the desired alignment using clamps or fixtures. Apply the hot air tool and tacking nozzle to create tack welds along the joint, ensuring proper alignment before proceeding.
- Adjust and weld: Set the hot air tool to initial temperature and airflow settings based on the plastic type. Conduct the full welding process by moving the tool evenly along the joint, maintaining a consistent speed and angle.
- Cool and inspect: Allow the welded pieces to cool naturally. After cooling, inspect the test weld for strength, uniformity, and any signs of weakness. Evaluate the fusion of plastics and ensure the joint meets the desired standards.
- Adjust and iterate: Based on the results, make any necessary adjustments to temperature, airflow, or technique. Use this process to refine your approach before applying the final weld to the actual project.
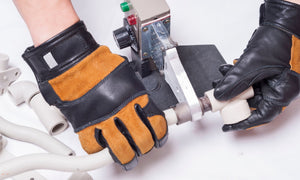
Finally, as always, use safety equipment like gloves, safety glasses, and tool stands.
>>Related read: 10 Plastic Welding Accessories That Can Instantly Improve Your Efficiency
Executing Your Plastic Weld
Before you even begin your weld or test weld, use clamps or fixtures to hold your pieces in place. Create tack welds with a tacking nozzle by briefly applying heat to the joint, allowing the plastic to soften and adhere. This initial bonding secures the pieces in place for the full weld.
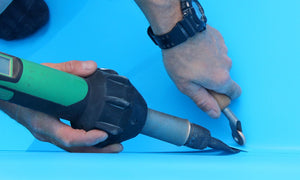
Once the surfaces are prepared and the pieces are tacked together, it's time to start the welding process. Hold the hot air tool at a 45-degree angle, moving it evenly along the joint. Keep a consistent speed and pay attention to the plastic's color, as it changes when reaching the melting point. Avoid overheating, as this can weaken the weld.
After completing the welding process, allow the plastic to cool naturally. Once cooled, inspect the weld for strength and integrity. If done correctly, the bond should be strong, and the welded area should exhibit properties similar to the original plastic.
>>Related read: How to Execute the 4 Most Common Types of Plastic Welds
Common Mistakes to Avoid When Plastic Welding
Embarking on your plastic welding journey may involve a learning curve, and understanding common pitfalls can help you navigate the process more successfully. Here are some frequent mistakes to watch out for, along with tips on how to avoid them:
- Overheating: Applying excessive heat can lead to the plastic becoming overly soft, weakening the weld and potentially causing deformation. To avoid this issue, use the temperature control feature on your hot air tool. Refer to guidelines for the specific plastic you are working with to determine the optimal temperature range.
- Inadequate surface preparation: Neglecting to thoroughly clean and prepare the surfaces before welding can result in a weak bond. To avoid this issue, clean your plastic surfaces properly, removing any dirt, grease, or contaminants. When necessary, use rubbing alcohol or a soapy water solution to ensure a clean and smooth welding surface.
- Incompatible plastic materials: Welding together plastics with significantly different melting points can lead to an uneven bond or even complete failure. To avoid this issue, always check the compatibility of the plastics you intend to weld. Choose materials with similar melting points to ensure a strong and uniform bond (use this guide here!).
- Insufficient tacking: Neglecting to create tack welds before the full welding process can result in misalignment and an unstable joint. To avoid this issue, use tack welds to secure the pieces in place before starting the full welding process. These initial bonds act as anchors, ensuring proper alignment during the entire welding procedure.
- Inconsistent welding: Uneven movement or inconsistent speed during welding can lead to an irregular and weak bond. To avoid this issue, hold the hot air tool at a 45-degree angle, moving it evenly along the joint at a consistent speed. Pay attention to the plastic's color, ensuring it uniformly reaches the melting point.
- Neglecting cooling time: Rushing the cooling process can result in a prematurely handled weld, leading to deformation or weakened structural integrity. To avoid this issue, allow the plastic to cool naturally. Rushing this phase may compromise the quality of the weld. Once cooled, assess the weld for strength and integrity before moving forward.
These mistakes can take place for any plastic welder—no matter their experience level. Learn from these mistakes, and don't be discouraged if your first attempts aren't perfect. Practice and experience are key to mastering the art of plastic welding.
Let IHS Guide Your Plastic Welding Journey
Still not quite sure where to start? Our team has decades of plastic welding experience, and we can help you accomplish your goals. Contact our team today and we’ll get back to you shortly with information about our extensive lineup, preventative maintenance, creating strong welds, and more.

- Robert Heater